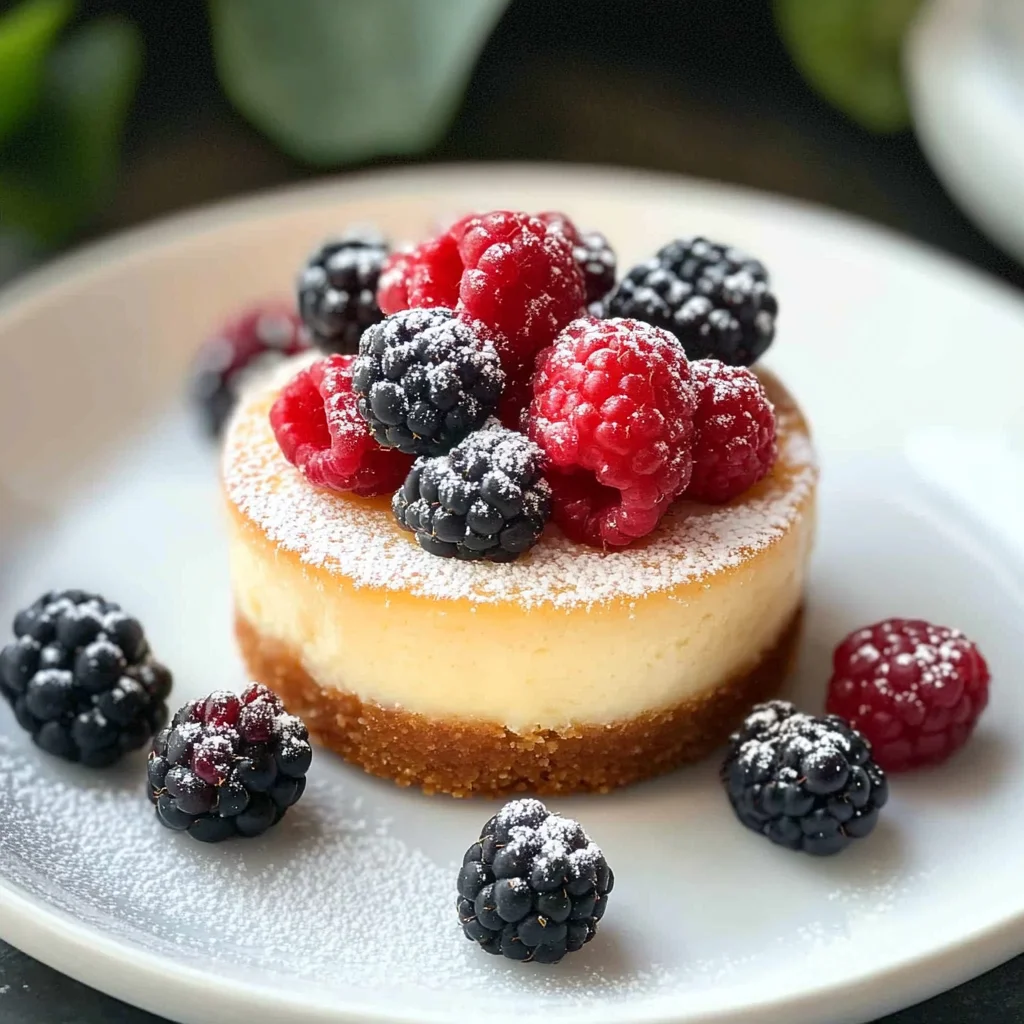
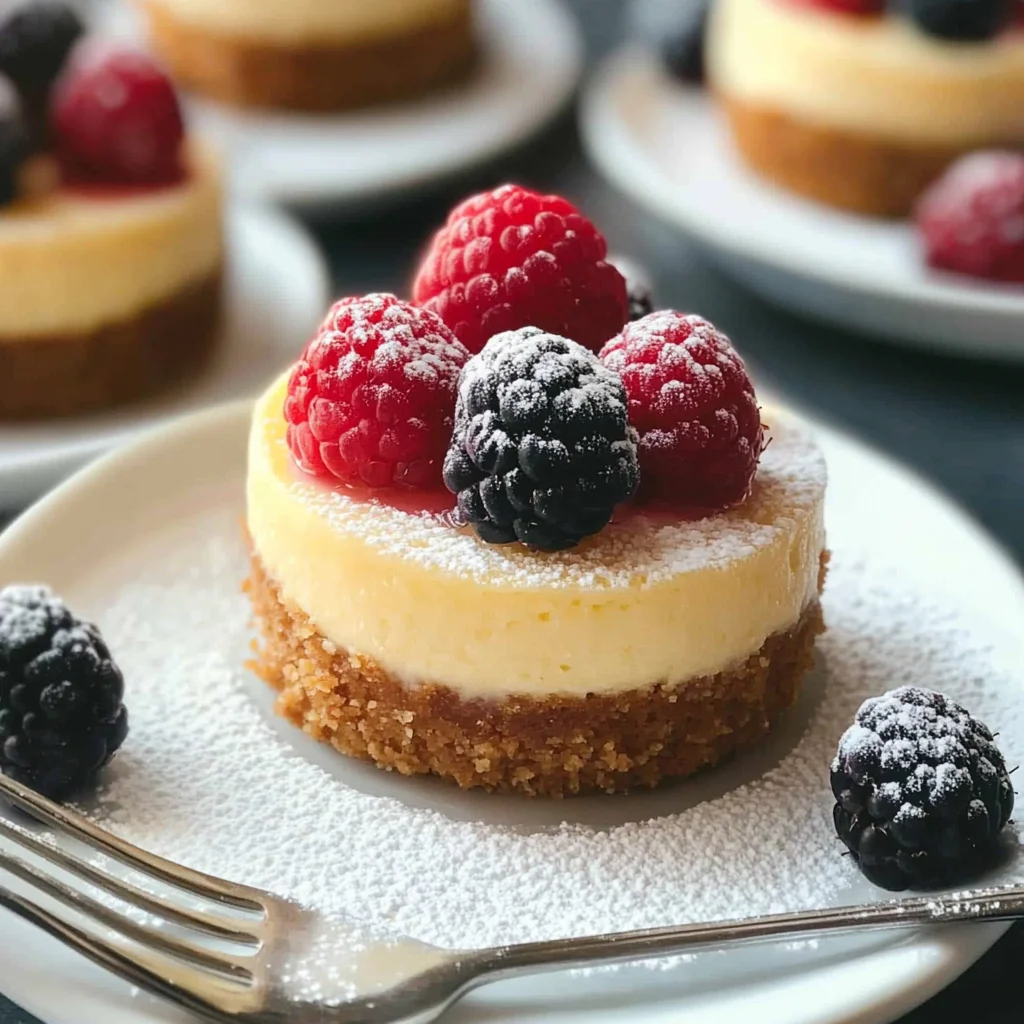
Gluten-Free Mini Cheesecakes
These Gluten-Free Mini Cheesecakes are a delightful treat that anyone can enjoy! Ideal for gatherings, these mini desserts stand out with their creamy texture and rich flavor. Their bite-sized charm makes them perfect for parties, potlucks, or even as a sweet finish to a family dinner. Plus, they’re incredibly easy to whip up, making them a go-to recipe for any occasion.
Why You’ll Love This Recipe
- Easy to Make: This recipe comes together quickly with simple ingredients and straightforward steps.
- Perfectly Portioned: Mini cheesecakes are great for serving at gatherings since they’re easy to grab and enjoy.
- Delicious Flavor: The combination of cream cheese, lemon zest, and vanilla creates a delightful taste that everyone will love.
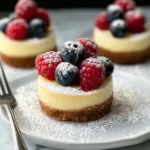
- Versatile Toppings: Customize your mini cheesecakes with berries or a dusting of powdered sugar for added flair.
- Gluten-Free Delight: Suitable for those following gluten-free diets without compromising on taste or texture.
Tools and Preparation
Gathering the right tools will make the process smoother. Having everything ready ensures you can focus on creating these delicious mini cheesecakes.
Essential Tools and Equipment
- Muffin pan
- Muffin liners
- Mixing bowls
- Electric hand mixer or stand mixer
- Measuring cups and spoons
- Rubber spatula
Importance of Each Tool
- Muffin pan: This is essential for shaping your mini cheesecakes perfectly.
- Electric hand mixer: It saves time and effort when blending the cream cheese and sugar until smooth.
- Rubber spatula: Ideal for scraping down the sides of your mixing bowl to ensure all ingredients are well combined.
Ingredients
These fuss-free gluten-free mini cheesecakes are perfect for parties or potlucks and couldn’t be any easier to make!
For the Crust
- 1 1/4 cups blanched almond flour
- 1/4 cup granulated sugar
- pinch of salt
- 1 tablespoon lemon zest
- 3 tablespoons unsalted butter (melted and cooled slightly)
For the Filling
- 2 8-ounce packages cream cheese
- 1/2 cup granulated sugar
- 1 teaspoon vanilla extract
- pinch of salt
- 2 large eggs (room temperature)
Optional Toppings
- berries
- powdered sugar
How to Make Gluten-Free Mini Cheesecakes
Step 1: Preheat the Oven
Preheat your oven to 350 degrees F. Line a muffin pan with 12 muffin liners.
Step 2: Prepare the Crust
In a medium mixing bowl:
1. Stir together all the dry ingredients (almond flour, sugar, salt, lemon zest).
2. Add melted butter and mix until thoroughly combined.
Step 3: Fill the Muffin Liners
Divide the mixture between the liners:
1. Use about 18 grams (or 3 1/2 teaspoons) per liner.
2. Lightly press down with the bottom of a shot glass.
Step 4: Bake the Crust
Bake for about 10 minutes or until very lightly browned. Remove from oven and cool for at least 10 minutes while preparing the filling.
Step 5: Make the Filling
With an electric hand mixer or stand mixer:
1. Beat cream cheese and sugar on medium speed until light and creamy.
2. Add vanilla extract and salt; mix until combined.
3. Beat in eggs one at a time on low speed until just incorporated—avoid over-mixing!
Step 6: Fill Each Liner
Fill each liner about two-thirds full with batter:
1. Bake for another 10 minutes or until centers don’t jiggle when tapped.
2. Open oven door at least one foot wide to cool them gradually—this takes about 1 ½ hours.
Step 7: Chill Before Serving
Remove paper liners after cooling:
1. Chill mini cheesecakes in the refrigerator for at least two hours before serving.
2. Decorate with berries and dust with powdered sugar if desired.
Enjoy your delicious gluten-free mini cheesecakes! These treats are sure to impress everyone who tries them!
How to Serve Gluten-Free Mini Cheesecakes
These gluten-free mini cheesecakes are delightful on their own but can be enhanced with a few creative serving suggestions. Here are some ideas to elevate your dessert experience.
Fresh Berries
- Top each mini cheesecake with a mix of fresh berries like strawberries, blueberries, or raspberries. This adds a pop of color and a refreshing taste.
Whipped Cream
- Serve with a dollop of whipped cream for a light and airy contrast to the rich cheesecake. You can use dairy or non-dairy options based on your preference.
Chocolate Drizzle
- Drizzle melted dark chocolate over the top for an indulgent touch. This complements the creamy texture and adds an irresistible sweetness.
Citrus Zest
- Sprinkle some additional lemon or lime zest on top for an extra zing. The citrus flavor brightens up the cheesecake and enhances its overall appeal.
Powdered Sugar Dusting
- For a simple yet elegant finish, dust with powdered sugar just before serving. This creates a visually appealing presentation.
Mint Leaves
- Garnish with fresh mint leaves to add a touch of freshness. Not only does it look great, but it also offers a refreshing taste that pairs well with the cheesecake.
How to Perfect Gluten-Free Mini Cheesecakes
Achieving the perfect gluten-free mini cheesecakes requires attention to detail. Here are some tips to ensure your cheesecakes turn out delicious every time.
-
Use room temperature ingredients: Allow cream cheese and eggs to come to room temperature before mixing. This helps achieve a smooth and creamy filling without lumps.
-
Don’t over-mix: When incorporating the eggs into the batter, mix just until combined. Over-mixing can lead to cracks in your mini cheesecakes during baking.
-
Cool gradually: After baking, let your cheesecakes cool gradually in the oven with the door ajar. This helps prevent sudden temperature changes that can cause cracks.
-
Chill thoroughly: Be sure to chill your mini cheesecakes for at least two hours before serving. This allows them to set properly and enhances their flavor.
Best Side Dishes for Gluten-Free Mini Cheesecakes
Pairing side dishes with gluten-free mini cheesecakes can create a well-rounded dessert spread. Here are some delicious options to consider:
-
Fruit Salad
A light fruit salad made with seasonal fruits adds freshness and balances the richness of the cheesecake. -
Chocolate-Covered Strawberries
These decadent treats complement mini cheesecakes beautifully and provide an added visual appeal. -
Cheese Platter
A selection of cheeses such as brie or goat cheese offers a savory contrast to the sweetness of the cheesecakes. -
Vanilla Ice Cream
Serve alongside scoops of vanilla ice cream for a classic combination that everyone loves. -
Caramel Sauce
A drizzle of homemade or store-bought caramel sauce enhances flavor and adds an indulgent twist when served alongside. -
Nut Mix
A bowl of spiced or candied nuts provides crunch and richness that pairs well with creamy desserts like mini cheesecakes. -
Coffee or Tea
Offering coffee or herbal tea as beverages serves as a perfect pairing, enhancing the flavors of your dessert menu while providing warmth.
Common Mistakes to Avoid
Making gluten-free mini cheesecakes can be simple, but there are a few common pitfalls. Here are some mistakes to avoid for the best results.
- Bold ingredient measurements: Not measuring ingredients accurately can lead to inconsistent texture. Always use measuring cups and spoons for precision.
- Bold over-mixing the batter: Over-mixing can make your cheesecakes dense. Mix just until combined to keep them light and fluffy.
- Bold skipping the cooling step: Allowing cheesecakes to cool completely before chilling is crucial. This helps prevent cracks and maintains their shape.
- Bold not using room temperature ingredients: Cold cream cheese can lead to lumps in your batter. Let your cream cheese sit out for about 30 minutes before mixing.
- Bold ignoring baking times: Different ovens have different baking times. Keep an eye on your cheesecakes, and check for doneness by tapping the pan.
Storage & Reheating Instructions
Refrigerator Storage
- Store gluten-free mini cheesecakes in an airtight container.
- They will stay fresh in the fridge for up to 4 days.
Freezing Gluten-Free Mini Cheesecakes
- Freeze mini cheesecakes by placing them in a single layer on a baking sheet until solid.
- Once frozen, transfer them to a freezer-safe container or zip-top bag for up to 2 months.
Reheating Gluten-Free Mini Cheesecakes
- Bold Oven: Preheat the oven to 300°F (150°C) and warm the cheesecakes for about 10-15 minutes.
- Bold Microwave: Heat individual cheesecakes on low power in 15-second intervals until warmed through.
- Bold Stovetop: Place a cheesecake in a small pan over low heat, cover, and warm gently for about 5 minutes.
Frequently Asked Questions
What are Gluten-Free Mini Cheesecakes?
Gluten-free mini cheesecakes are bite-sized desserts made without gluten-containing ingredients, making them perfect for those with dietary restrictions.
How do I customize my Gluten-Free Mini Cheesecakes?
You can add different flavors like lemon, chocolate, or peanut butter by incorporating extracts or mix-ins into the batter.
Can I make these mini cheesecakes dairy-free?
Yes! Substitute cream cheese with a dairy-free alternative and ensure other ingredients are also dairy-free.
How should I serve Gluten-Free Mini Cheesecakes?
Top with fresh berries or a drizzle of fruit sauce for added flavor and presentation. They are great as party desserts!
Final Thoughts
These gluten-free mini cheesecakes are not only easy to make but also versatile enough to fit any occasion. You can customize them with various toppings or flavors, making them a delightful treat everyone will enjoy. Try this recipe today and impress your guests with these delicious bites!
Gluten-Free Mini Cheesecakes
Indulge in the rich and creamy goodness of Gluten-Free Mini Cheesecakes, a delightful dessert perfect for any occasion. These bite-sized treats are not only incredibly easy to make but also customizable with your favorite toppings. With a luscious cream cheese filling and an almond flour crust, they satisfy your sweet tooth without gluten or animal-derived gelatin. Whether you’re hosting a gathering or simply treating yourself, these mini cheesecakes will impress everyone with their flavor and presentation. Elevate your dessert game with this simple recipe that promises deliciousness in every bite!
- Prep Time: 15 minutes
- Cook Time: 20 minutes
- Total Time: 35 minutes
- Yield: Makes approximately 12 mini cheesecakes 1x
- Category: Dessert
- Method: Baking
- Cuisine: American
Ingredients
- 1 1/4 cups blanched almond flour
- 1/4 cup granulated sugar
- pinch of salt
- 1 tablespoon lemon zest
- 3 tablespoons unsalted butter (melted)
- 2 packages (8 ounces each) cream cheese
- 1/2 cup granulated sugar
- 1 teaspoon vanilla extract
- pinch of salt
- 2 large eggs (room temperature)
- berries
- powdered sugar
Instructions
- Preheat your oven to 350°F (175°C). Line a muffin pan with muffin liners.
- In a bowl, mix almond flour, granulated sugar, salt, and lemon zest. Stir in melted butter until combined.
- Divide the mixture evenly among the muffin liners and press down lightly.
- Bake for about 10 minutes until lightly browned. Allow cooling while preparing the filling.
- In another bowl, beat cream cheese and sugar until creamy. Add vanilla extract, salt, and eggs one at a time; mix until just combined.
- Pour the filling into the cooled crusts until two-thirds full. Bake for another 10 minutes or until set.
- Let cool gradually in the oven with the door ajar for 1½ hours, then chill in the refrigerator for at least two hours before serving.
Nutrition
- Serving Size: 1 cheesecake (45g)
- Calories: 170
- Sugar: 10g
- Sodium: 120mg
- Fat: 12g
- Saturated Fat: 7g
- Unsaturated Fat: 3g
- Trans Fat: 0g
- Carbohydrates: 14g
- Fiber: 2g
- Protein: 3g
- Cholesterol: 50mg